

I designed 2 very different quilts that contain Storks. Both quilts would be the perfect gift for a new baby - especially as large wall hangings!

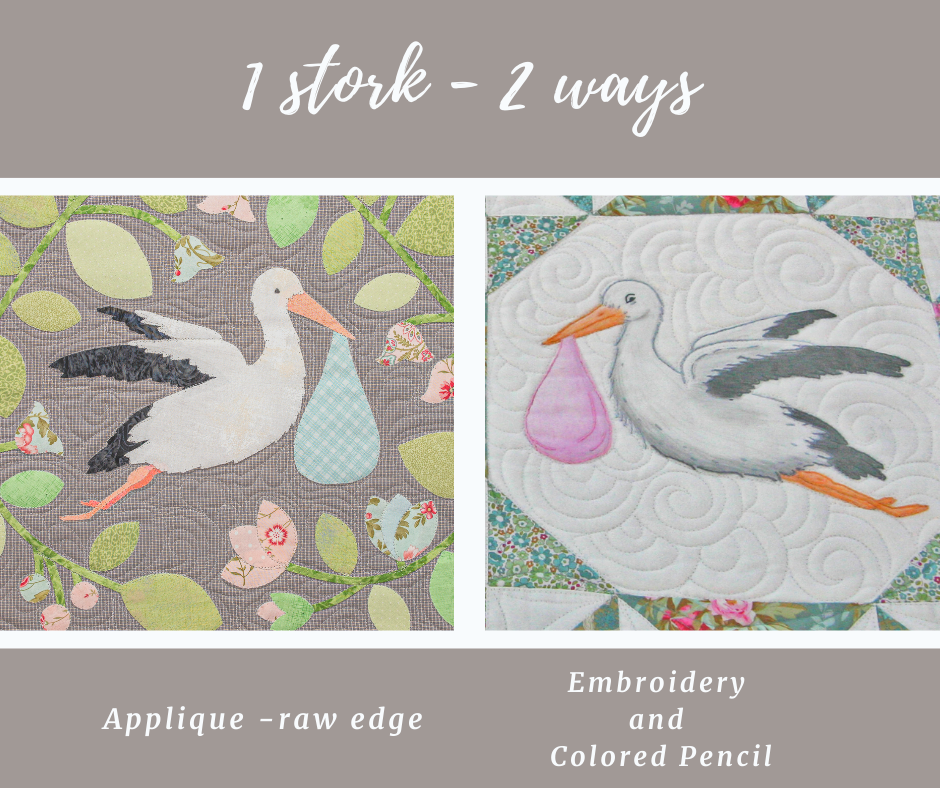
The first quilt is called 'Welcome Storks'. This quilt is a simple Embroidery quilt! The storks are first traced onto the fabric, colored with color pencils, and then Embroidered. The Embroidery only calls for a simple 'Backstitch' to outline the birds. The coloring with is as simple as coloring in a coloring book (nothing to be intimidated by). The colored pencils should be treated with a 'Fabric Medium' (simply brushed over the top of a colored design). The Fabric Medium will make the colors permanent and machine washable.
The 4 Colored and Embroidered Storks were then Pieced into 4 large blocks. I used using 3 coordinating green colors and a 1 cream colored background fabric. I used a Tilda Fabric line called Woodlands for the green colors. Below is a close up of one of the large blocks.

The second Stork quilt is called 'Storks on Parade,' and it is a Raw Edge Applique quilt.

This quilt is a Raw Edge Applique quilt. I used Steam-A-Seam as my Fusible. I first traced the stork images to the paper side of the fusible, and then ironed the fusible to the wrong side of the fabric. I then cut out the stork images, and then ironed the stork to the background fabric. I then used a blanket stitch on my sewing machine and sewed around the entire stork images in coordinating thread. Below is a close-up.

I did 2 different versions of this quilt. In one version, I used a Colored Pencil to add some shadows to the Storks. In this second version, I also used a Pigma Pen to draw in the eye as opposed to using a 'French Knot' as the eye. Below is a close-up.
